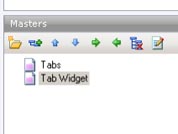
Designers using Axure RP Pro will quickly discover that it’s really easy to create widgets as a master in order to efficiently reuse those items. Another great functionality in Axure are dynamic panels, they make it easy to create on-screen interactions like tabbed widgets or let you change the status of an item easily. Complex prototyping is made easy this way.
Masters and dynamic panels don’t cooperate
Unfortunately masters and dynamic panels don’t always work very well together. For instance, it’s not possible to put an interaction in a master in order to change the status of a dynamic panel which is outside that master. You’ll either have to place the dynamic panel inside the master, or put the interaction in another seperate element.
I think I found a way to be able to use masters inside a widget and at least make it seem like the elements within the master affect the status of the dynamic panel.
Download example tab widget
I’ve upped an example of the tab widget I’m describing in this post.
Just download it to see if it’s useful for you!
Axure tab widget (79Kb)
Jakub Linowski recently created a useful list of Axure libraries on his great blog about wireframes.
Why would we want this?
- You can now easily maintain the hyperlinks in one place;
- change the content of the unselected tabs in one place;
- you only need to change the selected tab content manually in each layer.
Create a tab master
Begin a new master and place all the desired tabs inside it. Make sure all the tabs are in an unselected state, don’t put actions on the elements. Put a solid line on top of all the tabs. You can then close the tabs master.
Create a dynamic panel
Start a new dynamic panel and make it the size you’ll ultimately want it to be. Add as many layers to the panel as you have tabs to click on. Fill every layer with the tabs master and add the content you wish every tab to contain. Finally add an extra tab to each layer with it’s selected state (probably white). Again, don’t add any actions to those tabs. Okay, we’re done here.
 Create a master for the tabs
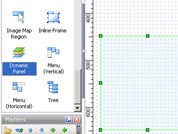 Make a dynamic panel for tab content
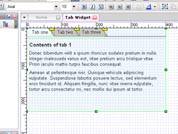 Add dynamic panel to a new master
Add the dynamic panel to a new master
Close all layers of the dynamic panel and start a new master. Drag the dynamic panel into this new master. Now add a box object to the master. Change it’s background color to transparent and remove the border. Put one of these transparent objects on top of each tab. Now change the onClick status of every transparent object to make the dynamic panel change to it’s corresponding tab content.
Now our dynamic tab widget is finished.
Chris
In the last paragraph you state: “Now add a box object to the master. Change it’s background color to transparent and remove the border. ”
Would it be more efficient to use an image map region instead? You wouldn’t have to fiddle with the background color and border.
Henk Wijnholds
@chris: That’s actually a very good comment. A way more efficient solution. Will change it in the example file that I’ve attached. Thanks a lot!
Gillian
Thanks guys this helped a lot 🙂
paulo72
Thanks for the article. A clear and concise explanation. Just the job.